5-Ingredient Pantry Pasta Dishes Ready in 15 Minutes

The familiar scenario unfolds yet again: you’ve just walked through your front door after a particularly demanding day, hunger gnawing insistently while your energy reserves hover dangerously close to empty. The refrigerator inspection reveals a discouraging landscape of random ingredients that seemingly resist cohesion into anything resembling a proper meal. The temptation to reach for delivery apps grows stronger with each passing minute.

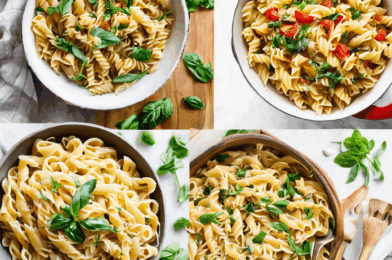
Before surrendering to another takeout evening, consider this culinary lifeline – your pantry likely contains everything necessary for remarkably satisfying pasta dishes requiring just five ingredients and 15 minutes. These aren’t compromise meals born purely from desperation, but rather cleverly constructed combinations that capitalize on pantry staples’ inherent potential.

The Science Behind Successful Pantry Pasta

Understanding several fundamental principles transforms limited ingredients into memorably delicious meals. The magic lies not in elaborate shopping lists but in technique and thoughtful combination.

The Pasta Water Secret

That cloudy liquid most home cooks discard actually represents liquid gold for sauce creation. As pasta cooks, it releases starch into the water, creating a naturally thickening agent crucial for sauce development. Skilled pasta makers always reserve at least 1 cup before draining.

When incorporated into minimal ingredient sauces, this starchy water:

  • Creates silky texture without added cream
  • Helps emulsify oil-based sauces
  • Provides necessary moisture without diluting flavor
  • Carries flavor molecules efficiently throughout the dish

The Flavor Concentration Principle

With fewer ingredients, maximizing each component’s contribution becomes essential. Several techniques intensify flavor profiles:

  • Toasting dried herbs and spices in oil releases volatile compounds
  • Browning garlic to golden (not dark brown) develops complexity
  • Reducing liquids concentrates existing flavors
  • Salt timing impacts perception (season cooking water generously)

Essential Pantry Building Blocks

Before exploring specific recipes, ensuring your kitchen contains these versatile foundation ingredients guarantees pasta success regardless of what else might be available:

Pasta Varieties:

  • Long shapes: spaghetti, linguine, fettuccine
  • Short shapes: penne, rigatoni, farfalle, orecchiette
  • Specialty options: orzo, couscous

Flavor Foundations:

  • Quality olive oil (one everyday version, one finishing oil)
  • Garlic (fresh preferred, but jarred works in emergencies)
  • Dried herbs (oregano, basil, red pepper flakes)
  • Anchovy paste or canned anchovies (adds depth without fishiness)

Shelf-Stable Add-Ins:

  • Canned tomatoes (whole, crushed, and paste)
  • Olives and capers
  • Canned beans (chickpeas, cannellini)
  • Nuts (pine nuts, walnuts, almonds)
  • Jarred roasted peppers
  • Artichoke hearts

Long-Lasting Fresh Items:

  • Hard cheeses (Parmesan, Pecorino)
  • Lemons and limes
  • Hardy herbs like rosemary

Five 15-Minute Pasta Formulas

Rather than rigid recipes, these adaptable frameworks accommodate whatever specific brands or variations your pantry contains.

1. Cacio e Pepe: Elegance Through Simplicity

This Roman classic demonstrates how minimal ingredients create extraordinary results through proper technique.

Ingredients:

  • 8 oz pasta (traditionally spaghetti, but any shape works)
  • 2 tablespoons butter
  • 1 tablespoon olive oil
  • 1½ teaspoons freshly ground black pepper
  • 1 cup grated Pecorino Romano (Parmesan substitutes beautifully)

Method:

  1. Cook pasta in heavily salted water until al dente
  2. Meanwhile, melt butter with olive oil in large skillet
  3. Add pepper, cooking until fragrant (about 30 seconds)
  4. Reserve 1 cup pasta water before draining
  5. Add ½ cup pasta water and drained pasta to skillet
  6. Reduce heat to low, add cheese gradually while tossing constantly
  7. Add additional pasta water as needed for silky consistency

Technique note: The continuous motion while adding cheese prevents clumping and creates the signature creamy sauce without cream.

2. Aglio e Olio with Breadcrumb Crunch

This southern Italian staple transforms humble ingredients into a textural delight.

Ingredients:

  • 8 oz pasta (spaghetti or linguine ideal)
  • ⅓ cup quality olive oil
  • 5-6 garlic cloves, thinly sliced
  • ½ teaspoon red pepper flakes
  • ½ cup toasted breadcrumbs (make from stale bread or crackers)

Method:

  1. Cook pasta in salted water until al dente
  2. Meanwhile, heat olive oil in large skillet over medium-low heat
  3. Add sliced garlic, cooking until golden but not brown (3-4 minutes)
  4. Add red pepper flakes, cook 30 seconds more
  5. Reserve ½ cup pasta water before draining
  6. Add drained pasta to skillet, tossing to coat
  7. Add splash of pasta water if needed for consistency
  8. Top with toasted breadcrumbs before serving

Variation note: Add chopped parsley or lemon zest if available, but this dish shines even without them.

3. Tomato-Butter Sauce: Transcendent Simplicity

Made famous by Italian cookbook author Marcella Hazan, this sauce seems impossibly good given its ingredient count.

Ingredients:

  • 8 oz pasta (any shape works beautifully)
  • 1 can (14 oz) whole peeled tomatoes
  • 5 tablespoons butter
  • 1 medium onion, peeled and halved
  • Parmesan cheese for serving

Method:

  1. Start pasta water heating while preparing sauce
  2. In separate saucepan, combine undrained tomatoes, butter, and onion halves
  3. Bring to simmer over medium heat
  4. Reduce heat to maintain gentle simmer for 10-15 minutes, occasionally crushing tomatoes with spoon
  5. Meanwhile, cook pasta until al dente
  6. Remove onion from sauce (can be saved for another use)
  7. Drain pasta, toss with sauce
  8. Top with grated Parmesan

Technique insight: The butter’s richness balances tomato acidity perfectly without added sugar or long cooking times.

4. Olive and Caper Puttanesca

This assertively flavored sauce requires no fresh ingredients yet delivers remarkable depth.

Ingredients:

  • 8 oz pasta (traditionally spaghetti)
  • 2 tablespoons olive oil
  • 3 cloves garlic, minced
  • 1 can (14 oz) crushed tomatoes
  • ⅓ cup combination of chopped olives and capers

Method:

  1. Cook pasta in salted water until al dente
  2. Meanwhile, heat oil in large skillet over medium heat
  3. Add garlic, cooking until fragrant but not browned (about 1 minute)
  4. Add crushed tomatoes, simmer 5 minutes
  5. Add olives and capers, simmer additional 2-3 minutes
  6. Reserve ½ cup pasta water before draining
  7. Toss drained pasta with sauce, adding splash of pasta water if needed

Pantry flexibility: Any olive variety works—kalamata, green, or mixed. The distinctive briny flavor profile shines regardless.

5. Creamy Chickpea and Lemon

This unexpectedly luscious dish creates creamy texture without dairy through clever technique.

Ingredients:

  • 8 oz pasta (short shapes like orecchiette work particularly well)
  • 1 can chickpeas, drained and rinsed
  • 3 tablespoons olive oil
  • 2 garlic cloves, minced
  • 1 lemon (zest and juice)

Method:

  1. Cook pasta in salted water until al dente
  2. Meanwhile, heat olive oil in large skillet over medium heat
  3. Add garlic, cooking until fragrant (about 1 minute)
  4. Add half the chickpeas, mashing roughly with wooden spoon
  5. Add remaining whole chickpeas
  6. Reserve 1 cup pasta water before draining
  7. Add drained pasta and ½ cup pasta water to skillet
  8. Toss continuously until sauce thickens
  9. Remove from heat, add lemon zest and juice

Texture secret: The contrast between mashed and whole chickpeas creates interesting texture variation.

Troubleshooting Common Pantry Pasta Challenges

Even these straightforward dishes sometimes present difficulties. These solutions address frequent issues:

Sauce Too Thin

Problem: Sauce slides off pasta rather than coating it Solution: Continue cooking sauce and pasta together in skillet until liquid reduces; add additional grated cheese which acts as thickener

Pasta Clumping

Problem: Pasta strands stick together after draining Solution: Drain pasta just before it reaches al dente and finish cooking directly in sauce; alternatively, toss immediately with olive oil if sauce isn’t ready

Flavor Balance Issues

Problem: Dish tastes flat despite following recipe Solution: Add brightness with acid (lemon juice, vinegar splash); increase saltiness with cheese rather than more table salt; incorporate umami through anchovy paste or soy sauce dash

Elevating Your Pantry Pasta Game

Once comfortable with these foundations, consider these strategies for continued development:

Pantry Optimization

Reorganize storage to create a dedicated “pasta emergency” section containing:

  • Individual portions of dried pasta in multiple shapes
  • Shelf-stable flavor boosters grouped together
  • Clear labeling system for quick identification

Freezer Supplements

Extend pantry possibilities with these freezer additions that maintain exceptional quality:

  • Frozen herbs in olive oil ice cubes
  • Grated cheese portions
  • Homemade breadcrumbs
  • Reserved portions of special ingredients

Technique Refinement

Practice these specific skills to elevate every pantry pasta:

  • One-pot pasta timing (adding ingredients in proper sequence)
  • Pasta water management (learning ideal amount for different sauces)
  • Heat level control (maintaining gentle simmer rather than vigorous boil)

Beyond Crisis Cooking: Intentional Pantry Pasta

While these recipes excel during urgent hunger situations, they deserve regular rotation regardless of circumstances. Consider implementing a weekly “pantry pasta night” with several benefits:

  • Reduces grocery budget by utilizing existing ingredients
  • Prevents pantry item stagnation
  • Builds intuitive cooking confidence
  • Creates space for culinary creativity within constraints

The most liberating revelation about pantry pasta comes through understanding that these dishes represent not compromised alternatives to “real cooking,” but rather the essence of Italian culinary philosophy—allowing quality ingredients to shine through minimal manipulation.

Next time emptiness greets you from the refrigerator, turn confidently toward your pantry. Within those shelves wait the components of dishes that have satisfied discriminating palates for generations—no compromises necessary, just fifteen minutes of alchemical transformation from basic ingredients to exceptional dining.

Instant Pot Miracle Meals: Set It and Forget It Brilliance

I’ll create an engaging, informative article about Instant Pot cooking that incorporates SEO best practices while using second-person perspective and natural keyword integration. The article will be structured for excellent readability and provide genuine value to readers looking to maximize their Instant Pot experience.

Instant Pot Miracle Meals: Set It and Forget It Brilliance

Transforming Your Kitchen Routine With Pressure Cooking Magic

Walking through your front door after a long workday, the thought of preparing dinner from scratch might feel overwhelming. Your stomach growls while energy reserves dwindle—yet another evening facing the cooking dilemma. This familiar scenario plays out in countless households, often leading to expensive takeout or nutritionally questionable convenience foods.

Enter the kitchen game-changer that’s revolutionized modern cooking: the Instant Pot. This multifunctional marvel combines pressure cooking brilliance with set-and-forget convenience, transforming how busy individuals approach mealtime. Beyond mere convenience, these remarkable appliances create culinary possibilities that traditional cooking methods simply cannot match.

Why Pressure Cooking Creates Unparalleled Results

The science behind pressure cooking explains why Instant Pot creations consistently deliver exceptional results. When cooking under pressure, boiling points rise significantly above normal levels, allowing foods to cook at higher temperatures without burning. This fundamental principle drives several remarkable benefits:

  • Drastically reduced cooking times (often 70% faster than conventional methods)
  • Enhanced flavor infusion as pressure forces seasonings deep into ingredients
  • Superior texture development, especially with traditionally tough cuts of meat
  • Remarkable nutrient retention compared to longer cooking approaches

Research from food science laboratories confirms that pressure-cooked meals retain up to 90% of vitamin content compared to considerably lower percentages from traditional stovetop cooking. Meanwhile, flavor compounds normally lost through evaporation remain trapped within your creation, developing remarkable taste profiles even busy weeknights deserve.

Essential Equipment for Instant Pot Success

While the appliance itself forms the foundation of your pressure cooking journey, several supplementary items enhance your experience considerably:

  • Extra silicone sealing rings (keeping separate rings for savory versus sweet preparations)
  • Steamer baskets allowing simultaneous cooking of multiple components
  • Non-scratch utensils protecting the inner pot’s surface
  • Tempered glass lid for slow-cooking functions
  • Stacking inserts enabling multiple-dish preparation simultaneously

Consider these additions investments rather than expenses—each expanding your cooking possibilities while enhancing convenience. Many experienced users maintain separate sealing rings exclusively for distinct cooking categories, preventing flavor transfer between disparate dishes.

Planning Your Pressure Cooking Approach

Successful implementation begins with thoughtful planning adapted to your household’s unique patterns. Consider these preparation strategies:

Weekly Meal Framework Development

Establish a rotating collection of proven recipes forming your household’s foundational meals. Many experienced users develop “pressure cooking blocks” in their weekly schedules—perhaps Sunday afternoons preparing staple proteins while Wednesday evenings focus on batch-cooking grains or legumes.

Creating ingredient categories streamlines shopping while maximizing cooking efficiency:

  1. Proteins requiring tenderizing (tough cuts, dried beans)
  2. Quick-cooking additions (vegetables, seafood)
  3. Aromatic foundations (onions, garlic, herbs)
  4. Finishing elements added after pressure release

This categorized approach ensures ingredients receive appropriate cooking treatments while simplifying preparation sequencing.

Mastering Essential Techniques

The transition from conventional cooking to pressure brilliance requires understanding fundamental techniques unique to this approach:

The Natural Versus Quick Release Decision

Perhaps no choice influences results more significantly than pressure release methodology. Quick release rapidly vents pressure, stopping cooking immediately—perfect for vegetables requiring precise doneness. Natural release allows pressure reduction gradually, continuing gentle cooking while developing deeper flavors—ideal for tough cuts requiring tenderizing.

Learning when each approach serves your dish represents crucial knowledge. General guidelines suggest:

  • Quick release: Foods prone to overcooking (vegetables, seafood, pasta)
  • Natural release: Tough proteins, beans, bone broths, dishes with high liquid content

Many recipes benefit from combined approaches—perhaps ten minutes natural release followed by quick release completion—balancing flavor development with textural preservation.

Layering Strategy Implementation

Unlike traditional cooking where ingredients typically cook simultaneously, pressure cooking often demands strategic layering. Understanding which components require full pressure exposure versus those added later prevents texture disasters.

Master these layering principles:

  • Position longer-cooking items directly in cooking liquid
  • Place quicker-cooking elements in steamer baskets above
  • Reserve delicate additions for after pressure release
  • Consider using intermittent pressure cycles for complex dishes

Through thoughtful ingredient positioning, single-pot meals emerge with each component perfectly cooked—from fork-tender proteins to vibrant vegetables maintaining structural integrity.

Weeknight Warriors: Ready in Under 30 Minutes

Transform mundane weeknights with these remarkable creations ready within half an hour:

Risotto Revolution

Traditional risotto demands 45 minutes of constant attention and stirring. Your pressure cooker creates restaurant-quality results in just six minutes under pressure. Simply sauté aromatics using the dedicated function, add arborio rice for quick toasting, introduce broth and seasonings, then pressure cook. The resulting creation emerges with perfect al dente texture and remarkable creaminess without constant supervision.

Wholesome Soup Creations

Soups normally requiring hours develop extraordinary depth in mere minutes. Begin with aromatic foundations using the sauté function, add longer-cooking ingredients with appropriate liquid, pressure cook briefly, then introduce delicate components after release. Even bone-based broths reaching extraordinary richness need just 35-40 minutes compared to traditional half-day simmering sessions.

Protein Perfection Platforms

Transform economical cuts into mouthwatering centerpieces through pressure magic. Chuck roasts become fork-tender in 35 minutes rather than four hours. Chicken thighs develop extraordinary succulence in just ten minutes under pressure. Even notoriously challenging brisket transforms into melt-in-your-mouth magnificence in just over an hour rather than the typical eight-hour slow roast.

Weekend Wonders: Worth the Wait

When time permits slightly longer cooking sessions, these creations deliver extraordinary results justifying modest additional preparation:

Yogurt Making Mastery

Commercial yogurt often contains unnecessary additives and stabilizers. Your Instant Pot creates remarkable homemade versions with just milk and starter culture. The dedicated yogurt function maintains perfect cultivation temperature, resulting in creamy, probiotic-rich creations at fraction of store-bought cost. Customize with preferred milk fat percentage and incubation duration controlling tanginess development.

Bean Brilliance Without Soaking

Traditional dried bean preparation requires overnight soaking followed by hours of simmering. Pressure cooking eliminates soaking requirements while reducing cooking time by approximately 75%. Black beans transform from rock-hard to perfectly tender in 30 minutes, while chickpeas require just 40 minutes from dried state. The resulting texture surpasses canned alternatives while offering significant cost savings.

Bone Broth Without All-Day Babysitting

Nutritional powerhouses traditionally requiring 12+ hours of careful temperature monitoring develop remarkable richness in just 120 minutes under pressure. The concentrated environment extracts collagen and minerals efficiently, creating foundation for countless culinary applications. Freeze portions in ice cube trays for convenient flavor boosting throughout your cooking week.

Troubleshooting Common Challenges

Even experienced users occasionally encounter difficulties. Address these common issues with proven solutions:

The “Burn” Notification Dilemma

This frustrating message typically indicates insufficient thin liquid at cooking pot bottom. Resolve by:

  • Ensuring thorough deglazation after sautéing
  • Adding thin cooking liquids before thick sauces
  • Creating separation layer between potential scorching ingredients and heating element
  • Avoiding stirring tomato-based ingredients into bottom layer

Many experienced users maintain separate “problem ingredient” protocols—perhaps adding tomato products only atop other ingredients or ensuring acidic components never contact the cooking surface directly.

Seal Formation Failures

Occasionally, your Instant Pot might struggle establishing proper pressure seal. Common solutions include:

  • Verifying sealing ring proper placement
  • Confirming steam release valve position
  • Checking sufficient thin liquid inclusion (minimum requirements vary by model)
  • Examining for foreign material on rim preventing proper closure

Developing systematic pre-start verification routines prevents most sealing challenges before they disrupt your cooking plans.

Beyond Basics: Advanced Applications

Once mastering fundamental techniques, explore these innovative applications:

  • “Pot-in-pot” cooking creating complete meals with distinctly separated components
  • Dessert creations like cheesecakes achieving unparalleled creaminess through pressure environment
  • Batch preparation of staple ingredients (shredded chicken, cooked grains) supporting multiple meals
  • Specialized cultural techniques like perfect congee or effortless dulce de leche

Many households discover their Instant Pot gradually expanding from occasional convenience to primary cooking methodology, enhancing nutrition while simplifying daily routines.

Your Next Steps: Implementation Blueprint

Ready to revolutionize your cooking approach? Begin implementation gradually:

  1. Start with familiar recipes specifically designed for pressure cooking
  2. Master fundamental techniques before attempting complex variations
  3. Develop personalized recipe collection reflecting household preferences
  4. Gradually incorporate pressure cooking into weekly meal planning framework

The rewards extend beyond mere convenience—households implementing pressure cooking consistently report improved nutrition, reduced food expenses, decreased energy usage, and significantly reduced mealtime stress.

The Instant Pot represents genuinely transformative technology, enabling delicious, nutritious meals despite busy modern schedules. Through thoughtful implementation and strategic technique development, your kitchen transforms from stress center to efficient culinary creation space, supporting your health goals and lifestyle needs with remarkable simplicity.

Smart Chopping: Prep Once, Eat Fresh All Week

Time-Saving Kitchen Revolution: Your Guide to Weekly Meal Preparation

Ever stood in your kitchen on a Wednesday evening, exhausted from work, staring blankly into the refrigerator wondering what to cook? The clock ticking, hunger growing, and motivation fading rapidly? You’re certainly not alone. Countless households face this daily dilemma, often resulting in unhealthy takeout decisions or uninspired, hastily assembled meals.

What if your weeknight routine could transform from kitchen dread to effortless meal assembly? Welcome to the world of strategic food preparation—specifically, the art of smart chopping. This approach revolutionizes how you interact with your kitchen, slashing cooking time while maximizing flavor and nutritional value throughout your entire week.

The Foundation of Smart Chopping: Why It Works

Smart chopping represents more than merely cutting vegetables in advance. It encompasses a comprehensive strategy for transforming raw ingredients into versatile components that maintain freshness and flavor throughout your week. Unlike traditional meal prepping where complete dishes sit in containers awaiting reheating, this method preserves ingredient integrity while dramatically reducing daily kitchen labor.

Research from nutrition experts reveals that properly stored prepped produce can maintain up to 90% of their nutritional value for several days. Meanwhile, studies examining time management in household settings indicate that organized meal preparation saves approximately 5-7 hours weekly—time you could redirect toward exercise, relaxation, or quality moments with loved ones.

Essential Equipment for Successful Preparation Sessions

Before diving into chopping techniques, ensuring you possess the proper tools makes all the difference between frustrating prep sessions and efficient kitchen work. Consider investing in:

  • A professional-grade chef’s knife (8-10 inches) for handling most cutting tasks
  • Several cutting boards dedicated to different food categories (preventing cross-contamination)
  • Quality storage containers with airtight seals
  • Specialized produce storage options (like breathable vegetable bags)
  • A mandoline slicer for consistent, ultra-thin cuts when needed
  • Color-coded kitchen towels for separating prepped items

The difference between struggling with dull knives versus gliding through vegetables with properly maintained cutlery cannot be overstated. Sharp, quality knives not only work more efficiently but dramatically reduce accident risks during preparation sessions.

Planning Your Smart Chopping Schedule

Successful implementation begins with thoughtful planning. Most households find Sunday afternoons ideal for weekly preparation, though your optimal timing depends entirely on personal schedules and cooking patterns.

Start by reviewing your weekly meal intentions. Which dishes share common ingredients? Which components require advance preparation? Which items maintain freshness longest? These considerations guide your chopping strategy.

Create ingredient categories based on preparation needs and storage characteristics:

  1. Hardy vegetables (carrots, celery, bell peppers)
  2. Delicate produce (leafy greens, herbs)
  3. Proteins requiring marination
  4. Aromatics (onions, garlic, ginger)
  5. Fruits for snacking versus cooking

Once categorized, establish preparation priorities. Hardy vegetables typically withstand longer storage periods, while delicate items might require mid-week refreshing or last-minute preparation.

Mastering Preservation Techniques

The hallmark of successful smart chopping lies in preservation mastery. Each ingredient category demands specific storage approaches:

Root Vegetables and Hardy Produce

Carrots, celery, bell peppers, and broccoli maintain remarkable freshness when properly stored. After thorough washing and complete drying (moisture accelerates spoilage), chop according to intended use. Store in glass containers lined with paper towels to absorb excess moisture. Replace towels mid-week if needed.

Professional kitchens often submerge certain cut vegetables (carrots, celery) in cold water, changing daily, extending freshness dramatically. For home applications, this works wonderfully for crudité platters or snacking vegetables.

Leafy Greens and Herbs

These delicate components require special attention. Wash thoroughly, spin completely dry, then wrap loosely in clean kitchen towels before refrigerating. For longer-lasting herbs, trim stems and place upright in small water containers (like flower arrangements), covering loosely with plastic bags. Change water every two days.

Consider partial preparation for items like kale or collards—remove tough stems during prep sessions while saving final chopping for cooking days.

Aromatics: Flavor Foundations

Onions, garlic, and ginger form flavor foundations for countless recipes. These powerful ingredients benefit from specialized preparation approaches:

  • Diced onions: Store separately to prevent flavor transfer
  • Minced garlic: Consider preparing infused oils instead of raw storage
  • Ginger: Freeze whole pieces, grating directly from frozen when needed

Some cooks prefer creating aromatic flavor bases (sofrito, mirepoix) in advance, freezing small portions in ice cube trays for instant flavor additions during weeknight cooking.

Strategic Chopping Techniques

Different dishes demand different cutting styles. Consider these preparation approaches for maximum versatility:

Multipurpose Vegetable Preparation

Rather than committing vegetables to single-use cuts, prepare various sizes from the same ingredients:

  • Bell peppers: Slice half into strips for stir-fries while dicing remainder for omelets
  • Carrots: Prepare matchsticks for salads alongside circular cuts for roasting
  • Celery: Create small dice for soups while maintaining longer pieces for snacking

This approach creates ingredient flexibility, allowing creative meal assembly throughout your week.

Protein Preparation Strategies

While complete protein cooking often occurs during weeknight meal assembly, certain preparation steps dramatically reduce evening effort:

  • Marinate proteins in separate containers, ready for quick cooking
  • Precook certain proteins (shredded chicken, ground meat mixtures) for immediate incorporation
  • Portion raw proteins into cooking-ready sizes, reducing handling during busy evenings

For vegetarian proteins, consider pre-soaking beans or preparing tofu by pressing and marinating, eliminating time-consuming steps during weeknight cooking.

Assembling Weeknight Meals From Prepped Components

The true magic happens when weeknight cooking transforms from lengthy preparation into simple assembly. With strategically chopped components awaiting, meals materialize in fraction of usual time:

  • Stir-fries require merely heating a pan before combining prepared proteins and vegetables
  • Grain bowls assemble in minutes when components wait ready in refrigerator containers
  • Salads transition from time-consuming projects to quick, nutritious solutions
  • Sheet pan dinners require only arrangement and seasoning before roasting

Each meal maintains freshness characteristics impossible with fully pre-cooked options while eliminating the preparation fatigue driving many toward less healthy alternatives.

Avoiding Common Meal Prep Pitfalls

Even experienced preparers encounter challenges. Watch for these common issues:

  • Over-preparation leading to waste (begin conservatively until establishing household patterns)
  • Cross-contamination during preparation (maintain strict food safety protocols)
  • Storage container shortages (invest in uniform, stackable options)
  • Motivation challenges (consider preparation with friends or family, creating social experiences)

Remember that smart chopping represents a skill developed through practice. Each week brings opportunities for refinement and adaptation to household preferences.

Beyond Basic Chopping: Advanced Strategies

Once mastering fundamental preparation techniques, consider these advanced approaches:

  • Create versatile sauces and dressings in advance, stored separately for multiple applications
  • Prepare flavor enhancers like toasted nuts, seeds, or breadcrumbs for instant texture additions
  • Develop component categories enabling family members to customize individual meals
  • Establish rotation patterns preventing taste fatigue while maintaining preparation efficiency

Many households discover that smart chopping eventually evolves beyond mere preparation into comprehensive cooking strategies transforming their entire relationship with food and nutrition.

Your Path Forward: Implementation Steps

Ready to revolutionize your kitchen approach? Begin implementation gradually:

  1. Start with familiar recipes, identifying preparation steps manageable in advance
  2. Invest in proper storage solutions before extensive preparation
  3. Begin with single-meal preparation before expanding to full weeks
  4. Document successful techniques while identifying personal preferences
  5. Gradually expand preparation categories as confidence grows

The rewards extend beyond mere convenience—households implementing strategic food preparation consistently report improved nutrition, reduced food expenses, decreased food waste, and significantly reduced mealtime stress.

Smart chopping represents a genuinely transformative approach to home cooking, enabling delicious, nutritious meals despite busy modern schedules. Through thoughtful preparation and strategic implementation, your kitchen transitions from stress center to efficient meal creation station, supporting health goals and lifestyle needs throughout your entire week.

Sheet Pan Suppers: One Tray, Zero Stress, Maximum Flavor

Sheet Pan Suppers: One Tray, Zero Stress, Maximum Flavor

Imagine walking through your front door after an exhausting day, hunger gnawing insistently while your energy reserves hover dangerously close to empty. The thought of orchestrating a complex dinner production—multiple pots bubbling, timers beeping, countertops disappearing under mounting dishes—feels absolutely insurmountable. Yet another takeout night looms, bringing with it the familiar blend of convenience, expense, and lingering guilt.

What if dinner preparation could require just five minutes of active effort, virtually no cleanup, and still result in a meal worthy of genuine enthusiasm? Welcome to the transformative world of sheet pan suppers—the cooking methodology that’s revolutionizing weeknight meals for busy households everywhere.

Why Sheet Pan Cooking Has Captured Culinary Hearts

The brilliance behind sheet pan cooking extends far beyond simple convenience. This approach harnesses fundamental culinary principles while eliminating unnecessary complications. The wide, shallow design of a standard baking sheet creates the perfect environment for two essential cooking techniques: caramelization and flavor concentration.

When ingredients spread across a sheet pan’s surface, they gain direct contact with intense, dry heat. This environment triggers the Maillard reaction—that magical process where proteins and sugars transform into hundreds of new flavor compounds. The result? Deeply browned edges, crispy exteriors, and intensified flavors throughout your ingredients without additional fats or complicated techniques.

Research from cooking behavior studies reveals that weeknight meal preparation typically faces three major obstacles: time constraints, cleanup dread, and recipe complexity. Sheet pan cooking directly addresses each barrier:

  • Time efficiency: Active preparation averages just 5-15 minutes
  • Cleanup simplicity: One cooking vessel, often lined with parchment for even easier washing
  • Recipe accessibility: Ingredient flexibility accommodates pantry realities

The Essential Equipment

While the concept seems straightforward, specific equipment characteristics significantly impact your results:

  • True sheet pans: Look for heavy-gauge aluminum with a 1-inch rim (technically called “half-sheet pans” in commercial settings)
  • Avoid nonstick surfaces: These prevent proper browning and deteriorate under high heat
  • Consider doubling up: Maintaining separate pans for sweet and savory preparations prevents flavor transfer

Mastering the Methodology: Core Principles for Sheet Pan Success

Transforming random ingredients into cohesive, properly cooked meals requires understanding several fundamental concepts:

Strategic Cutting for Uniform Cooking

The most common sheet pan cooking mistake involves inconsistent ingredient sizes, resulting in partially overcooked and undercooked components on the same tray. Follow these guidelines:

  • Dense vegetables: Cut into 1-inch pieces (potatoes, carrots, winter squash)
  • Medium-density vegetables: 1.5-inch pieces (bell peppers, zucchini, onions)
  • Quick-cooking vegetables: 2-inch pieces (mushrooms, cherry tomatoes)

For proteins, thickness matters more than length or width:

  • Chicken breasts: Butterfly or pound to even thickness
  • Fish fillets: Select similar-sized pieces or fold thin sections under
  • Beef/pork: Cut into consistent strips rather than chunks for quicker cooking

The Thoughtful Arrangement

Rather than random scattering, strategic positioning significantly improves results:

  • Border placement: Position longer-cooking items around pan edges where heat concentrates
  • Center positioning: Quick-cooking or delicate ingredients belong in the middle
  • Vertical stacking: Avoid at all costs—overlapping ingredients steam rather than roast
  • Breathing room: Maintain at least ¼-inch between pieces to prevent moisture trapping

Temperature Management Mastery

While 425°F (220°C) serves as an excellent baseline, adjustments create specific outcomes:

  • Higher heat (450°F/230°C): Creates exceptional caramelization for naturally sweet vegetables
  • Lower heat (375°F/190°C): Better for fatty proteins to prevent smoking
  • Variable approach: Start high for browning, reduce for gentle finishing

Five Sheet Pan Formulas for Foolproof Suppers

Rather than rigid recipes, these adaptable frameworks accommodate ingredient substitutions based on seasonal availability and personal preference.

Mediterranean Fish Spectacular

This bright, herb-forward creation transforms mild fish through surrounding aromatics.

Ingredients:

  • 4 white fish fillets (cod, halibut, or tilapia work beautifully)
  • 1 pint cherry tomatoes, halved
  • 1 red onion, sliced into ¼-inch half moons
  • 1 medium zucchini, cut into half-moons
  • 2 tablespoons olive oil
  • 1 lemon, thinly sliced
  • 3 tablespoons mixed fresh herbs (oregano, thyme, parsley)
  • ½ cup Kalamata olives (optional)

Method:

  1. Preheat oven to 425°F
  2. Toss vegetables with 1½ tablespoons olive oil, salt, and pepper
  3. Spread on sheet pan and roast 10 minutes
  4. Season fish with remaining oil, salt, and pepper
  5. Place fish on partially cooked vegetables
  6. Arrange lemon slices over fish
  7. Return to oven for 10-12 minutes until fish flakes easily
  8. Scatter fresh herbs and olives before serving

Customization notes: Any quick-cooking vegetables work wonderfully here—bell peppers, thin asparagus, or green beans make excellent substitutions.

Asian-Inspired Chicken & Broccoli

This weeknight wonder delivers takeout flavors without the delivery fee or excessive sodium.

Ingredients:

  • 1½ pounds boneless chicken thighs
  • 1 large broccoli crown, cut into florets
  • 1 red bell pepper, sliced
  • 3 tablespoons reduced-sodium soy sauce
  • 2 tablespoons honey
  • 1 tablespoon sesame oil
  • 2 teaspoons grated fresh ginger
  • 3 garlic cloves, minced
  • 1 tablespoon sesame seeds

Method:

  1. Preheat oven to 425°F
  2. Whisk together soy sauce, honey, sesame oil, ginger, and garlic
  3. Toss chicken with half the marinade
  4. Arrange chicken on sheet pan, avoiding overlap
  5. Roast 10 minutes
  6. Toss vegetables with remaining marinade
  7. Add vegetables to pan, surrounding chicken
  8. Roast additional 12-15 minutes until chicken reaches 165°F internally
  9. Sprinkle with sesame seeds before serving

Serving suggestion: Prepare quick-cooking rice or noodles while the sheet pan works its magic for a complete meal with minimal effort.

Sausage & Root Vegetable Medley

This hearty option capitalizes on the natural sweetness vegetables develop through roasting.

Ingredients:

  • 1 pound smoked sausage (kielbasa, andouille, or Italian), sliced into coins
  • 1 large sweet potato, 1-inch cubes
  • 2 carrots, cut into 1-inch pieces
  • 1 parsnip, cut into 1-inch pieces
  • 1 red onion, cut into 1-inch chunks
  • 2 tablespoons olive oil
  • 1 tablespoon maple syrup
  • 2 teaspoons fresh thyme
  • 1 teaspoon smoked paprika

Method:

  1. Preheat oven to 425°F
  2. Toss vegetables with oil, maple syrup, thyme, paprika, salt and pepper
  3. Spread on sheet pan and roast 15 minutes
  4. Add sausage pieces, distributing among vegetables
  5. Roast additional 10-15 minutes until vegetables are tender and sausage edges crisp

Seasonal adaptations: Substitute any root vegetables based on seasonal availability—turnips, rutabagas, or golden beets integrate beautifully.

Plant-Powered Tofu & Vegetable Fiesta

This protein-rich vegetarian option satisfies with complex flavors and varied textures.

Ingredients:

  • 1 block extra-firm tofu, pressed and cut into 1-inch cubes
  • 1 red bell pepper, chunked
  • 1 green bell pepper, chunked
  • 1 medium zucchini, cut into half-moons
  • 1 red onion, chunked
  • 1 can black beans, drained and rinsed
  • 2 tablespoons olive oil
  • 2 teaspoons cumin
  • 1 teaspoon chili powder
  • 1 teaspoon garlic powder
  • ½ teaspoon cayenne (optional)
  • 1 lime, quartered
  • Fresh cilantro for serving

Method:

  1. Preheat oven to 425°F
  2. Toss tofu with 1 tablespoon oil and half the spice mixture
  3. Arrange tofu in single layer on one side of sheet pan
  4. Roast 10 minutes
  5. Toss vegetables and beans with remaining oil and spices
  6. Add vegetables to empty side of pan
  7. Roast additional 15-20 minutes, stirring once
  8. Serve with lime wedges and cilantro

Serving variation: Warm tortillas transform this into fantastic tacos, or serve over cooked quinoa for an additional protein boost.

Italian Sausage & Pepper Simplicity

This classic combination delivers restaurant-quality results with minimal effort.

Ingredients:

  • 1 pound Italian sausage links (sweet or hot)
  • 2 bell peppers (any color), sliced
  • 1 large yellow onion, sliced
  • 1 pint cherry tomatoes
  • 3 cloves garlic, sliced
  • 2 tablespoons olive oil
  • 1 tablespoon Italian seasoning
  • ¼ cup fresh basil, torn

Method:

  1. Preheat oven to 400°F
  2. Pierce sausages several times with fork
  3. Arrange sausages in center of sheet pan
  4. Toss vegetables with oil, Italian seasoning, salt and pepper
  5. Arrange vegetables around sausages
  6. Roast 30-35 minutes, turning sausages halfway through
  7. Scatter fresh basil before serving

Serving options: Slide into hoagie rolls for sandwiches or serve alongside crusty bread for soaking up the flavorful juices.

Troubleshooting Common Sheet Pan Challenges

Even experienced sheet pan cooks occasionally encounter difficulties. These solutions address frequent issues:

Moisture Management

Problem: Vegetables releasing water, causing steaming instead of roasting Solution: Increase pan size or use two pans; pat watery vegetables dry before roasting; avoid overcrowding

Cooking Timing Alignment

Problem: Some ingredients finish before others Solution: Stagger addition of ingredients based on cooking times; precook dense vegetables in microwave for 2-3 minutes before sheet pan assembly

Flavor Development Challenges

Problem: Bland results despite proper cooking Solution: Season in layers (before, during, and after cooking); incorporate umami-rich ingredients (Parmesan, mushrooms, tomato paste); finish with acid (lemon juice, vinegar drizzle)

Elevating Your Sheet Pan Repertoire

Once basic techniques feel comfortable, these advanced approaches expand possibilities:

Double Sheet Pan Dinners

Using two sheet pans simultaneously allows cooking foods requiring different temperatures or timing. For example:

  • Sheet pan #1: Protein and hardy vegetables at 425°F
  • Sheet pan #2: Quick-cooking vegetables or garlic bread at 375°F

Strategic Finishing Touches

Adding specific elements after cooking transforms basic sheet pan meals into memorable dining experiences:

  • Textural contrast: Toasted nuts or seeds scattered over finished dishes
  • Fresh flavor bursts: Chopped herbs, gremolata, or chimichurri drizzled after cooking
  • Complementary sauces: Simple yogurt-based sauces or tahini drizzles served alongside

Conclusion: Embracing the Sheet Pan Revolution

Sheet pan cooking represents more than just another kitchen technique—it embodies a philosophical shift toward simplified, intentional meals that deliver maximum flavor with minimum fuss. The liberation from complex multi-step cooking processes doesn’t sacrifice quality but rather refocuses attention on ingredient quality and thoughtful preparation.

By mastering these fundamental approaches, your weeknight dinner routine transforms from a dreaded chore into a manageable—perhaps even enjoyable—experience. The sheet pan becomes not just a cooking vessel but a canvas for culinary creativity within realistic weekday constraints.

Start with whichever formula aligns with your household preferences and pantry realities. Observe how ingredients transform through the simple application of heat and thoughtful seasoning. Before long, the sheet pan becomes your trusted ally in consistent, delicious, stress-free suppers that nourish both body and spirit.

Breakfast in a Jar: 5 Make-Ahead Morning Meals

The morning rush rarely accommodates thoughtful meal preparation. Between hitting snooze multiple times, navigating shower schedules, and scrambling to locate misplaced keys, breakfast often becomes an afterthought—something grabbed hastily or skipped entirely. The consequences ripple throughout your day: mid-morning energy crashes, impaired concentration, and the inevitable unhealthy lunch choices that follow when hunger reaches desperate levels.

What if transforming your morning nutrition required just 15 minutes of weekend preparation? Enter the world of jar breakfasts—ingenious, portable meal solutions that align perfectly with contemporary lifestyles. These cleverly layered creations rescue countless busy professionals, parents, and students from the tyranny of breakfast skipping while delivering genuinely satisfying nutrition.

Why Mason Jar Breakfasts Are Revolutionizing Morning Routines

Nutritionists consistently identify breakfast as a cornerstone meal, yet approximately 31% of Americans regularly skip morning nourishment. Research published in the American Journal of Clinical Nutrition demonstrates that breakfast consumption positively affects cognitive function, particularly memory and attention—critical factors for workplace and academic performance.

Mason jar breakfasts solve multiple challenges simultaneously:

  • Time efficiency: Preparation happens during weekend downtime rather than hectic weekday mornings
  • Portion control: Jars naturally limit serving sizes while satisfying hunger
  • Reduced food waste: Ingredients stay properly contained and visible, preventing forgotten produce
  • Transportability: Secured lids allow worry-free transport to workplaces, campuses, or adventure destinations
  • Visual motivation: Appealing layers encourage consumption of nutrient-dense foods

The Environmental Edge

Beyond personal benefits, these sustainable breakfast solutions reduce reliance on single-use packaging. A standard mason jar, properly maintained, lasts for decades—a significant improvement over disposable breakfast packaging that contributes to landfill overflow. The environmental mathematics becomes compelling: replacing five takeout breakfasts weekly saves approximately 260 disposable containers annually.

Essential Elements for Jar Breakfast Success

Before exploring specific recipes, understanding fundamental principles ensures consistent success with this breakfast approach.

Container Considerations

While mason jars represent the classic vessel, several options work effectively:

  • Wide-mouth glass jars: Easiest for filling and eating directly from the container
  • Silicone-equipped containers: Provide leakproof transport without glass breakage concerns
  • Repurposed glass food jars: Convert pasta sauce or pickle containers into breakfast vessels after thorough cleaning

Regardless of container selection, capacity matters. For heartier breakfast eaters, 16-ounce (pint) jars provide satisfying portions, while 8-ounce versions work perfectly for lighter appetites or supplementary foods.

Fundamental Layering Principles

Strategic ingredient placement prevents soggy disappointments:

  1. Base barriers: Start with ingredients that withstand prolonged moisture contact
  2. Middle terrain: Position items benefiting from slight moisture absorption here
  3. Top protection: Reserve delicate ingredients for final placement

Additionally, practical considerations enhance experience:

  • Leave approximately one inch of headspace for ingredients that expand
  • Secure lids tightly immediately after preparation
  • Store upright, particularly for liquid-heavy preparations
  • Label with preparation date using masking tape or erasable markers

Five Make-Ahead Breakfast Powerhouses

These specific jar recipes balance nutrition, flavor complexity, and practical considerations. Each provides roughly 300-450 calories with balanced macronutrients for sustained energy release.

1. Protein-Packed Overnight Oats

Overnight oats continue dominating morning meal trends for good reason—they combine convenience with remarkable nutritional versatility. This protein-enhanced version provides approximately 22 grams of protein per serving.

Ingredients per jar:

  • ½ cup rolled oats (avoid instant varieties)
  • 2 tablespoons unflavored protein powder
  • 1 tablespoon chia seeds
  • ¾ cup unsweetened milk (dairy or plant-based)
  • 2 tablespoons Greek yogurt
  • ¼ cup berries (fresh or frozen)
  • 1 tablespoon chopped nuts

Assembly strategy:

  1. Combine oats, protein powder, and chia seeds in jar
  2. Pour milk over dry ingredients
  3. Layer yogurt next
  4. Top with berries and nuts
  5. Refrigerate overnight or up to 4 days

Morning customization: Drizzle with small amount of honey or maple syrup if desired. The texture develops beautifully overnight as chia seeds expand and oats soften perfectly—never mushy, always substantial.

2. Mediterranean Breakfast Parfait

This savory breakfast option challenges sweet-dominated morning offerings with protein-rich Greek yogurt and vegetable nutrients.

Ingredients per jar:

  • ½ cup full-fat Greek yogurt
  • 2 tablespoons hummus
  • ¼ cup diced cucumber
  • 2 tablespoons diced roasted red peppers
  • 2 tablespoons crumbled feta cheese
  • 1 tablespoon chopped olives
  • 1 tablespoon toasted pine nuts
  • Fresh herbs (dill or parsley work beautifully)

Assembly strategy:

  1. Spread yogurt as bottom layer
  2. Add hummus layer
  3. Create middle layer with cucumber and roasted peppers
  4. Top with feta, olives, pine nuts and herbs
  5. Refrigerate up to 3 days

Morning activation: Allow jar to stand at room temperature 10 minutes before enjoying, as flavors express most vibrantly at moderated temperatures rather than straight from refrigeration.

3. Tropical Chia Pudding Sunrise

Chia seeds’ remarkable absorption properties create pudding-like consistency while delivering omega-3 fatty acids, fiber, and protein. This tropical variation provides vacation vibes regardless of actual location.

Ingredients per jar:

  • 3 tablespoons chia seeds
  • 1 cup coconut milk (canned or carton variety)
  • ½ teaspoon vanilla extract
  • 2 tablespoons unsweetened coconut flakes
  • ¼ cup diced fresh pineapple
  • ¼ cup diced mango
  • 1 tablespoon macadamia nuts, chopped

Assembly strategy:

  1. Combine chia seeds, coconut milk and vanilla in jar
  2. Stir thoroughly, then refrigerate 15 minutes
  3. Stir again to prevent clumping
  4. Top with coconut flakes and fresh fruit
  5. Add chopped nuts just before refrigerating
  6. Chill overnight or up to 4 days

Serving suggestion: This particular recipe benefits from transport in separate containers if carrying to work—tropical fruits occasionally release excess moisture during extended storage periods.

4. Savory Breakfast Quinoa Bowl

Challenging conventional breakfast boundaries, this protein-rich option incorporates dinner leftovers intelligently.

Ingredients per jar:

  • ½ cup cooked quinoa
  • 2 tablespoons pesto
  • ¼ cup cherry tomatoes, halved
  • 2 tablespoons diced bell pepper
  • 1 soft-boiled egg, peeled
  • 1 tablespoon crumbled goat cheese
  • Fresh basil leaves

Assembly strategy:

  1. Layer quinoa at bottom
  2. Spread pesto over quinoa
  3. Add vegetable layer
  4. Place peeled soft-boiled egg carefully on top
  5. Sprinkle with goat cheese and basil
  6. Refrigerate up to 2 days

Morning enhancement: Bring to room temperature before enjoying, or microwave for 30 seconds with lid removed if warm breakfast is preferred.

5. Apple-Cinnamon Breakfast Barley Bowl

Ancient grains provide distinctive chewiness and nutritional profiles differing from standard breakfast cereals. Barley specifically offers impressive fiber content with distinctive nutty undertones.

Ingredients per jar:

  • ½ cup cooked pearl barley
  • ½ apple, diced small
  • 2 tablespoons dried cranberries
  • 1 tablespoon almond butter
  • ½ teaspoon cinnamon
  • ¼ cup milk of choice
  • 1 tablespoon hemp seeds

Assembly strategy:

  1. Place barley in jar bottom
  2. Mix apple pieces with cinnamon and layer above barley
  3. Add cranberries next
  4. Dollop almond butter along jar side
  5. Add milk just before refrigerating
  6. Sprinkle hemp seeds on top
  7. Refrigerate up to 3 days

Serving variation: For warm breakfast option, microwave jar contents for 60-90 seconds before consuming.

Customization Framework for Endless Variations

While specific recipes provide excellent starting points, developing your signature jar breakfast involves understanding component categories and substitution principles.

Grain Foundation Options

  • Traditional: oats, quinoa, barley, farro, rice
  • Grain-free: chia seeds, hemp hearts, flaxseed meal

Protein Enhancers

  • Dairy-based: Greek yogurt, cottage cheese
  • Plant-powered: silken tofu, protein powder, nut butters

Flavor Infusions

  • Sweet profiles: vanilla extract, cinnamon, cocoa powder, maple syrup
  • Savory directions: pesto, curry powder, everything bagel seasoning

Textural Elements

  • Crunchy components: nuts, seeds, granola clusters
  • Chewy additions: dried fruits, coconut flakes

Troubleshooting Common Jar Breakfast Challenges

Even experienced jar meal enthusiasts occasionally encounter difficulties. These solutions address frequent concerns:

Texture Troubles

  • Too watery: Reduce liquid components by 2 tablespoons; increase absorptive ingredients
  • Too thick: Increase liquid slightly; choose larger grain varieties
  • Undesirable softening: Layer problematic ingredients separately; add morning of consumption

Storage Struggles

  • Lid condensation: Leave slightly more headspace; ensure ingredients reach room temperature before refrigerating
  • Ingredient discoloration: Add acid components (lemon juice) to prevent oxidation of fruits like apples or bananas
  • Jar seal challenges: Check for rim cracks; replace damaged lids

Beyond Breakfast: Strategic Preparation Sessions

Maximizing efficiency involves thoughtful planning beyond individual jars:

Weekend Prep Workflow

  1. Prepare multiple grain bases simultaneously in large batch
  2. Chop fruits and vegetables for entire week
  3. Portion protein components for daily assembly
  4. Create assembly station with measured ingredients
  5. Complete construction of breakfast jars within 15-20 minutes

Supply Management

Maintain inventory of essential components:

  • Various jar sizes for different appetite needs
  • Replacement lids (most common failure point)
  • Erasable markers or labels for dating
  • Core ingredients with extended shelf life

Conclusion: Morning Transformation Through Planning

Reclaiming your morning begins with deliberate preparation during calmer moments. These carefully constructed breakfast jars represent more than convenient nutrition—they embody intentional self-care within busy modern schedules. The modest weekend time investment yields exponential returns in weekday sanity, nutritional quality, and environmental responsibility.

Start with a single recipe that aligns with your flavor preferences and morning energy needs. Experience firsthand how these portable powerhouses transform previously chaotic mornings into smoother, more nourished beginnings. Your breakfast jar awaits—along with the improved energy, concentration, and satisfaction that follows.

The 3-2-1 Method: Complete Dinners with Just 6 Ingredients

Standing in your kitchen after a demanding day, staring blankly into the refrigerator while hunger grows and patience diminishes—this scenario plays out in countless homes every evening. The complexity of dinner preparation often becomes the final straw in an already overwhelming day. What if a straightforward formula could transform your evening meal routine, minimizing both ingredients and effort while maximizing satisfaction?

Enter the 3-2-1 Method: a revolutionary approach to meal planning that delivers complete, balanced dinners using just six ingredients. This system breaks down meal components into three distinct categories: three vegetables, two proteins, and one carbohydrate. The result? Nutritionally sound, visually appealing meals that require minimal shopping, preparation, and mental bandwidth.

Why the 3-2-1 Method Works When Other Systems Fail

Traditional recipes often demand extensive ingredient lists, specialized items you might use once before they languish in your pantry, and complicated techniques that require full concentration. The 3-2-1 Method strips cooking down to its essential elements while maintaining the fundamental principles of balanced nutrition.

Research consistently demonstrates that decision fatigue impacts our food choices significantly. By late afternoon, most individuals have made hundreds of decisions, depleting their mental resources for complex meal planning. The 3-2-1 system eliminates decision overload by providing a clear structure that ensures nutritional balance without requiring extensive mental calculations.

Additionally, grocery studies indicate the average household wastes approximately 30% of food purchased, often because recipes call for partial amounts of perishable items. The streamlined approach of the 3-2-1 Method dramatically reduces waste through purposeful ingredient selection and usage.

The Foundation: Understanding Your Building Blocks

The brilliance of this method lies in its flexibility within a structured framework. Let’s explore each component:

The “3”: Vegetable Foundation

Incorporating three different vegetables accomplishes several objectives simultaneously:

  • Nutritional diversity: Different colored vegetables provide varying antioxidants, vitamins, and minerals
  • Textural contrast: Combining crisp, soft, and chewy elements creates satisfying mouthfeel
  • Visual appeal: A colorful plate naturally stimulates appetite

Consider grouping your vegetables by cooking method rather than type:

  • Quick-cooking: Leafy greens, bell peppers, mushrooms, zucchini
  • Roasting champions: Brussels sprouts, cauliflower, sweet potatoes, carrots
  • Raw crunchers: Cucumber, radishes, sugar snap peas, shredded cabbage

The “2”: Protein Powerhouses

The protein component provides satiety and essential amino acids. Including two different protein sources introduces several advantages:

  • Complementary amino acid profiles: Particularly valuable when incorporating plant-based proteins
  • Cost efficiency: Allows stretching premium proteins (like seafood or steak) by pairing with economical options
  • Textural variety: Soft and firm protein elements create interesting eating experiences

Your protein selections might include:

  • Animal-based: Eggs, chicken, fish, beef, pork, Greek yogurt
  • Plant-based: Beans, lentils, tofu, tempeh, seitan, nuts

The “1”: Carbohydrate Foundation

The carbohydrate element provides necessary energy while anchoring the meal. Options include:

  • Grains: Rice, quinoa, farro, barley, couscous
  • Starchy vegetables: Potatoes, sweet potatoes, winter squash
  • Alternative bases: Polenta, pasta, bread, tortillas

Mastering Flavor Without Ingredient Overload

Critics might question whether six ingredients can truly deliver satisfying flavor. The secret lies in strategic ingredient selection and preparation methods that maximize taste without expanding your shopping list.

The Concentrated Flavor Principle

Certain cooking techniques naturally intensify flavors without additional ingredients:

  • Caramelization: Roasting vegetables until edges brown develops natural sweetness
  • Reduction: Allowing liquids to simmer down concentrates existing flavors
  • Browning proteins: Developing color on protein surfaces creates complex flavor compounds

Strategic Pantry Heroes

While maintaining the six-ingredient parameter for fresh components, certain pantry staples elevate the entire dish without counting toward your total:

  • Universal flavor enhancers: Salt, pepper, olive oil
  • Acid brightness: Lemon juice, vinegars, wine
  • Aromatic foundations: Garlic, onions, ginger
  • Spice blends: Za’atar, Italian seasoning, curry powder

Putting Theory Into Practice: 3-2-1 Method in Action

Understanding the framework provides the foundation, but seeing practical applications brings the concept to life. Consider these template meals:

Mediterranean-Inspired Bowl

Vegetables (3):

  • Roasted red bell peppers
  • Sautéed spinach
  • Cucumber slices

Proteins (2):

  • Chickpeas
  • Crumbled feta cheese

Carbohydrate (1):

  • Couscous

Preparation approach: Cook couscous according to package directions. While it steams, sauté spinach with a touch of garlic. Slice roasted bell peppers from jar. Drain and rinse chickpeas. Assemble bowl with couscous as base, surrounded by vegetables and proteins. Drizzle with olive oil, lemon juice, salt and pepper.

Asian-Influenced Plate

Vegetables (3):

  • Broccoli florets
  • Shredded carrots
  • Sugar snap peas

Proteins (2):

  • Baked tofu cubes
  • Scrambled eggs

Carbohydrate (1):

  • Brown rice

Preparation approach: Cook rice in advance. Stir-fry broccoli and carrots until crisp-tender. Add sugar snap peas for final minute. Push vegetables aside, scramble eggs in same pan. Combine with pre-baked tofu cubes. Serve over rice with soy sauce.

Comfort Food Classic

Vegetables (3):

  • Roasted butternut squash
  • Sautéed mushrooms
  • Steamed green beans

Proteins (2):

  • Rotisserie chicken
  • White beans

Carbohydrate (1):

  • Quinoa

Preparation approach: Cook quinoa according to package. Roast pre-cut butternut squash until caramelized. Sauté mushrooms until golden. Steam green beans until bright green. Warm drained white beans with shredded rotisserie chicken. Assemble with quinoa as base, surrounded by colorful components.

Building Your Personal 3-2-1 System

Transforming this method into your personalized solution requires thoughtful implementation:

Conducting a Preference Inventory

Identify your household’s favorite ingredients in each category:

  1. List vegetables everyone enjoys
  2. Catalog protein preferences
  3. Note preferred carbohydrate options

This creates your personalized “ingredient pool” for easy selection.

Creating Preparation Templates

Different weeknights often present varying time constraints. Develop preparation templates for:

  • 30-minute dinners: Quick-cooking proteins, pre-prepped vegetables
  • Hands-off evenings: Sheet-pan or slow-cooker adaptations
  • Weekend batch cooking: Components prepared in advance for quick assembly

Storage Solutions for Success

Maximize ingredient versatility through proper storage:

  • Vegetable preservation: Wash and prepare sturdy vegetables in advance
  • Protein portioning: Divide and freeze proteins in meal-sized quantities
  • Carbohydrate batch cooking: Prepare grains in quantity for multiple meals

Advanced 3-2-1 Strategies

Once comfortable with the basic framework, explore these enhancements:

Seasonal Adaptations

Adjust your ingredient pool quarterly to incorporate:

  • Spring’s tender greens and young vegetables
  • Summer’s abundant tomatoes, corn, and zucchini
  • Autumn’s hearty squashes and root vegetables
  • Winter’s sturdy greens and cruciferous vegetables

Global Flavor Profiles

Create themed nights using regionally-appropriate ingredients:

  • Mediterranean: Olives, feta, chickpeas, lemon
  • Mexican: Black beans, avocado, corn, cilantro
  • Asian: Edamame, sesame, ginger, lime

Family-Friendly Modifications

Adapt the method for households with varying preferences:

  • Component service allows individual customization
  • Consistent carbohydrate provides familiar foundation
  • Introduce new vegetables alongside familiar options

Measuring Success Beyond the Plate

The 3-2-1 Method delivers benefits extending far beyond simplified dinners:

  • Reduced food waste: Purposeful purchasing decreases spoilage
  • Expanded vegetable consumption: Framework encourages plant diversity
  • Decreased mealtime stress: Eliminated decision fatigue improves family dynamics
  • Enhanced cooking confidence: Consistent success builds culinary self-assurance

Transforming your dinner approach doesn’t require culinary school training or elaborate pantry overhauls. The 3-2-1 Method provides an accessible framework for creating satisfying, nutritious meals with minimal ingredients and maximum impact. By embracing this streamlined approach, you’ll discover that limitation often sparks creativity, and simplicity frequently yields the most satisfying results.

Start tonight with ingredients already in your kitchen. Select three vegetables, two proteins, and one carbohydrate. Apply basic cooking techniques, season thoughtfully, and witness how six ingredients transform into a complete dinner worth gathering around the table to enjoy.

Freezer to Table in 30: Meal Prep Magic for Busy Weeknights

Walking through your front door after a long workday, the last thing anyone wants is to spend an hour cooking dinner. The familiar evening dilemma presents itself: order takeout (again), cobble together a mediocre meal from whatever’s in the fridge, or face the daunting task of preparing something from scratch when your energy reserves have long been depleted.

But what if you could transform your weeknight dinner routine with just a few hours of weekend preparation? Welcome to the world of freezer meal magic—where a bit of planning translates into delicious, home-cooked meals ready in 30 minutes or less.

Why Freezer Meal Prep Is Your Secret Weapon

Freezer meal preparation isn’t just another fleeting kitchen trend. For countless households, it represents the difference between consistent nutritious dining and surrendering to the convenience of processed foods. The practice bridges the gap between our ideals of healthy home cooking and the reality of limited weeknight time.

Research indicates the average household discards approximately 30% of purchased groceries. Freezer meal planning dramatically reduces this waste while simultaneously trimming your grocery expenditure. Moreover, studies suggest families who implement meal planning consume a broader spectrum of nutrients and generally maintain healthier weight levels.

The Financial Advantage

Crunching the numbers makes the benefit crystal clear. Consider this: A typical takeout meal costs roughly $15-25 per person. Freezer meals? Usually between $3-7 per serving. For a household of four, that difference accumulates to savings exceeding $2,000 annually.

Setting Yourself Up for Success

Before diving into recipes, establishing the proper foundation ensures your freezer meal journey thrives rather than becomes another abandoned cooking venture.

Essential Equipment

While specialized gadgets aren’t mandatory, certain tools make the process considerably smoother:

  • Quality freezer containers (glass containers with secure lids work wonderfully)
  • Heavy-duty freezer bags (ideally reusable silicone options for environmental mindfulness)
  • Labeling supplies (masking tape and permanent markers work perfectly)
  • Measuring cups and spoons
  • Large mixing bowls
  • Sheet pans for flash-freezing items

Space Organization

Successful freezer cooking hinges on accessible storage. Before your initial prep session:

  1. Conduct a freezer inventory clearance
  2. Group similar items together
  3. Dedicate specific zones for various meal types
  4. Consider labeling shelves or drawers

Mastering the 30-Minute Timeline

The “30 minutes to table” commitment isn’t arbitrary—it’s carefully calculated to accommodate real-world schedules. This timeframe includes:

  • Thawing (if necessary)
  • Heating or final cooking
  • Simple finishing touches
  • Serving

For this system to function reliably, proper labeling becomes crucial. Each container should clearly indicate:

  • Dish name
  • Preparation date
  • Detailed reheating instructions
  • Suggested side dishes or garnishes

Freezer-Friendly Recipe Portfolio

The cornerstone of successful freezer meal planning lies in selecting recipes that maintain their quality throughout freezing, thawing, and reheating. While certain dishes suffer textural degradation (crispy items, delicate vegetables), countless options flourish with this method.

One-Pot Wonders

These comprehensive meals require minimal additional preparation:

Hearty Vegetable & Bean Chili

This fiber-packed powerhouse improves with time as flavors meld. Simply thaw overnight, then simmer for 20 minutes while preparing a simple side salad.

Mediterranean Chicken Stew

Featuring tender chicken thighs, olives, preserved lemons, and aromatic herbs, this stew reheats beautifully. Serve over quickly-cooked couscous for an instant transport to coastal Mediterranean villages.

Component Cooking

This approach involves preparing individual elements separately, then combining during final preparation:

Customizable Grain Bowls

Freeze cooked grains (quinoa, farro, brown rice) in portion-sized containers, alongside separately frozen protein options and roasted vegetable medleys. Assembly takes minutes while maintaining textural integrity.

DIY Stir-Fry Kits

Package sliced, marinated protein with prepped hardy vegetables and portion-sized sauce packets. This combination hits the pan frozen and transforms into dinner within 15 minutes.

Smart Semi-Homemade

These recipes leverage quality convenience items alongside homemade elements:

Elevated Tortellini Soup

Store-bought cheese tortellini pairs with freezer-preserved homemade vegetable broth, mirepoix, and chopped greens for a sophisticated yet simple dinner.

Weeknight Enchilada Casserole

Layer prepared enchilada sauce with tortillas, pre-cooked protein, and cheese. Freeze unbaked, then transfer directly from freezer to oven for a hands-off dinner solution.

Strategic Prep Day Approach

Transforming your weekend cooking session into a productivity powerhouse requires thoughtful planning:

  1. Theme-Based Efficiency: Focus each session on similar ingredients or techniques (e.g., “sheet pan roasting day” or “ground meat recipes”)
  2. Assembly Line Method: Complete each task across all recipes before moving to the next (chop all vegetables, then brown all meats, etc.)
  3. Scaling Logic: Double or triple recipes strategically, considering both freezer space and family preferences
  4. Cool Completely: Allow everything to reach room temperature before freezing to prevent crystallization and preserve texture

Beyond Dinner: Breakfast and Lunch Solutions

While dinner often dominates meal planning discussions, applying freezer preparation techniques to other mealtimes yields additional benefits:

Morning Rush Rescuers

  • Overnight oats frozen in portion cups
  • Breakfast burritos with scrambled eggs, roasted potatoes, and vegetables
  • Homemade whole-grain freezer waffles
  • Smoothie ingredient packs

Midday Refuel Options

  • Soup portions in individual containers
  • Grain salads that maintain texture when thawed
  • Wrapped sandwich elements (cooked proteins, spreads)

Troubleshooting Common Challenges

Even experienced freezer meal practitioners encounter occasional hurdles:

Freezer Burn Prevention

  • Remove as much air as possible from containers
  • Use proper freezer-specific storage
  • Maintain consistent freezer temperature
  • Follow first-in, first-out usage pattern

Texture Preservation

  • Slightly undercook pasta and grains
  • Blanch vegetables briefly before freezing
  • Use higher-fat dairy products which separate less

Flavor Enhancement

  • Season more assertively than usual, as freezing can mute certain flavors
  • Add fresh herbs, acids, or crunchy elements upon serving

Sustainable Practices for Long-Term Success

Creating a sustainable freezer meal routine involves continuous refinement:

  1. Feedback Loop: Maintain notes on family favorites and recipes needing adjustment
  2. Gradual Expansion: Begin with 2-3 freezer meals weekly, increasing as confidence grows
  3. Seasonal Adaptation: Leverage seasonal produce abundance for freezer meal creation
  4. Community Exchange: Organize neighborhood freezer meal swaps for variety

From Planning to Peace of Mind

The true value of freezer meal preparation extends beyond simple convenience—it transforms your relationship with weeknight cooking. Rather than approaching evening meals with dread, you’ll experience the satisfaction of nourishing yourself and loved ones with minimal daily effort.

By dedicating occasional focused time to preparation, you create space for what truly matters during busy weeknights: connection, relaxation, and presence. The investment pays dividends not just in nutritional and financial benefits, but in reclaimed time and reduced stress.

Start small, refine your approach, and watch as your freezer becomes not just a storage space, but a treasure trove of homemade convenience that aligns with your values and lifestyle.